How to start contributing
A Step-by-Step Guide
Welcome to OnlyDust! Let’s walk through the process to get you started.
Step 1: Sign up on OnlyDust
To get started, you'll need to sign up on OnlyDust.
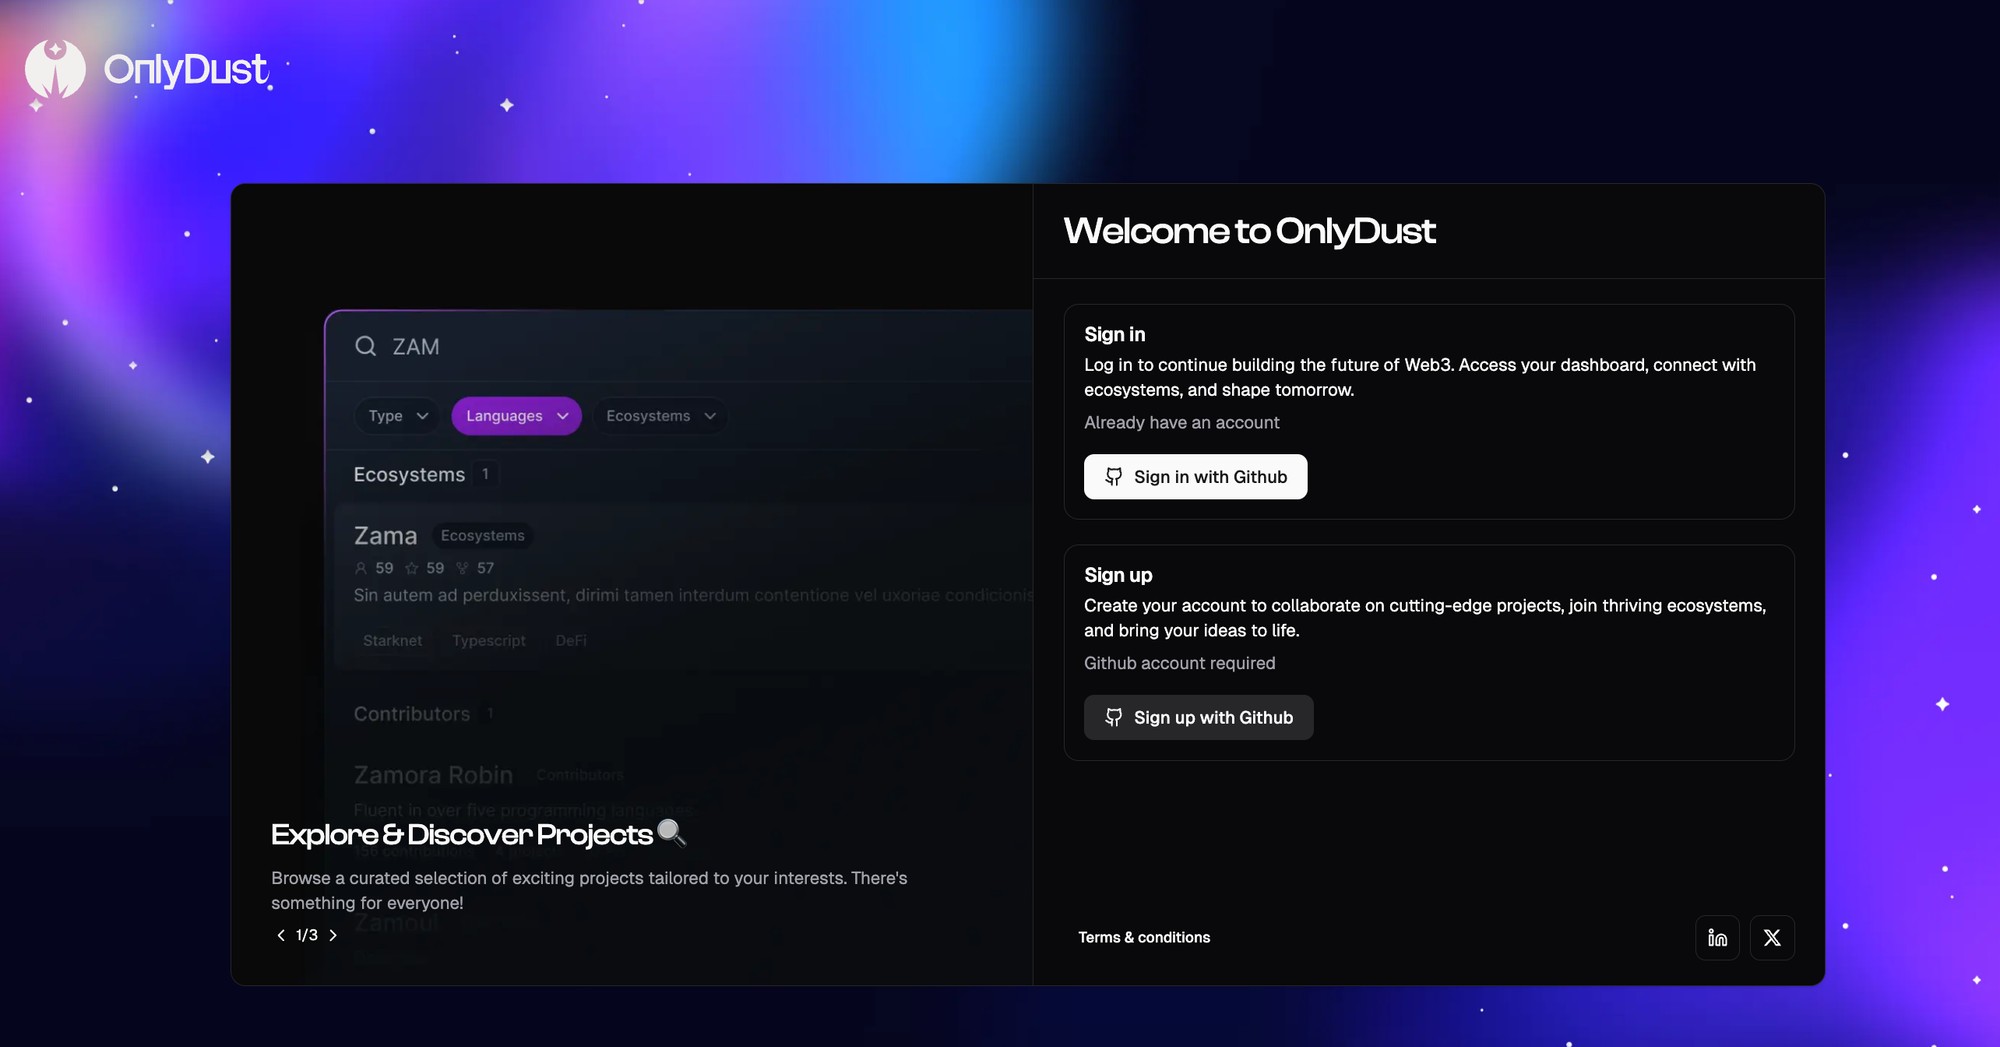
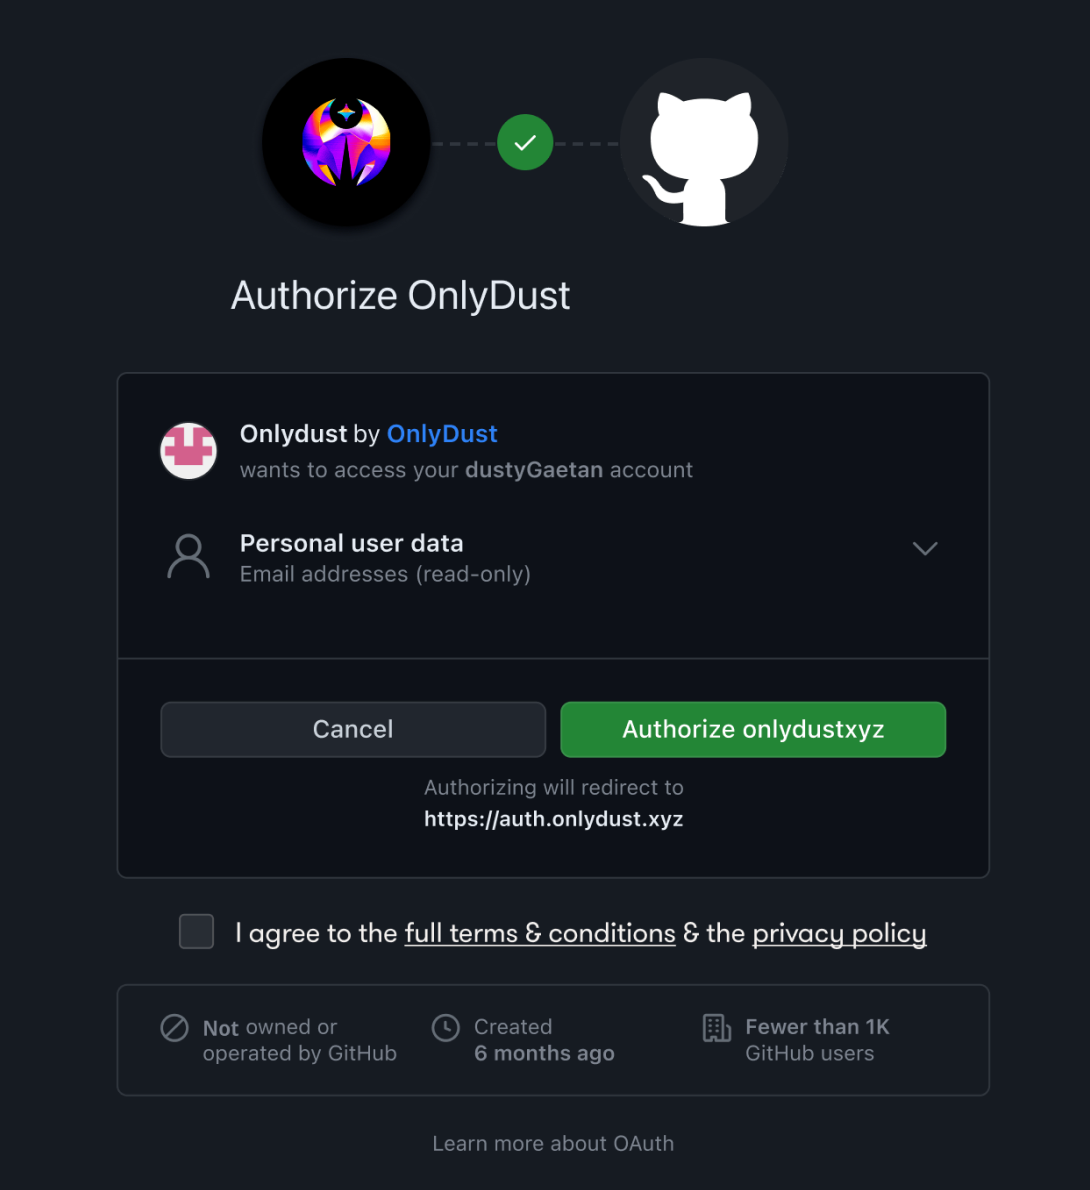
You will then be asked to connect your GitHub account to OnlyDust.
- Authorize GitHub: It is important to give permissions when connecting OnlyDust to GitHub. This is essential for tracking your contributions and syncing your work between both platforms. It allows us to track pull requests, issues, and other activities across GitHub.
Step 2: Accept the terms & conditions.
You’ll need to confirm your basic information before proceeding and ensure that you agree to OnlyDust's policies.
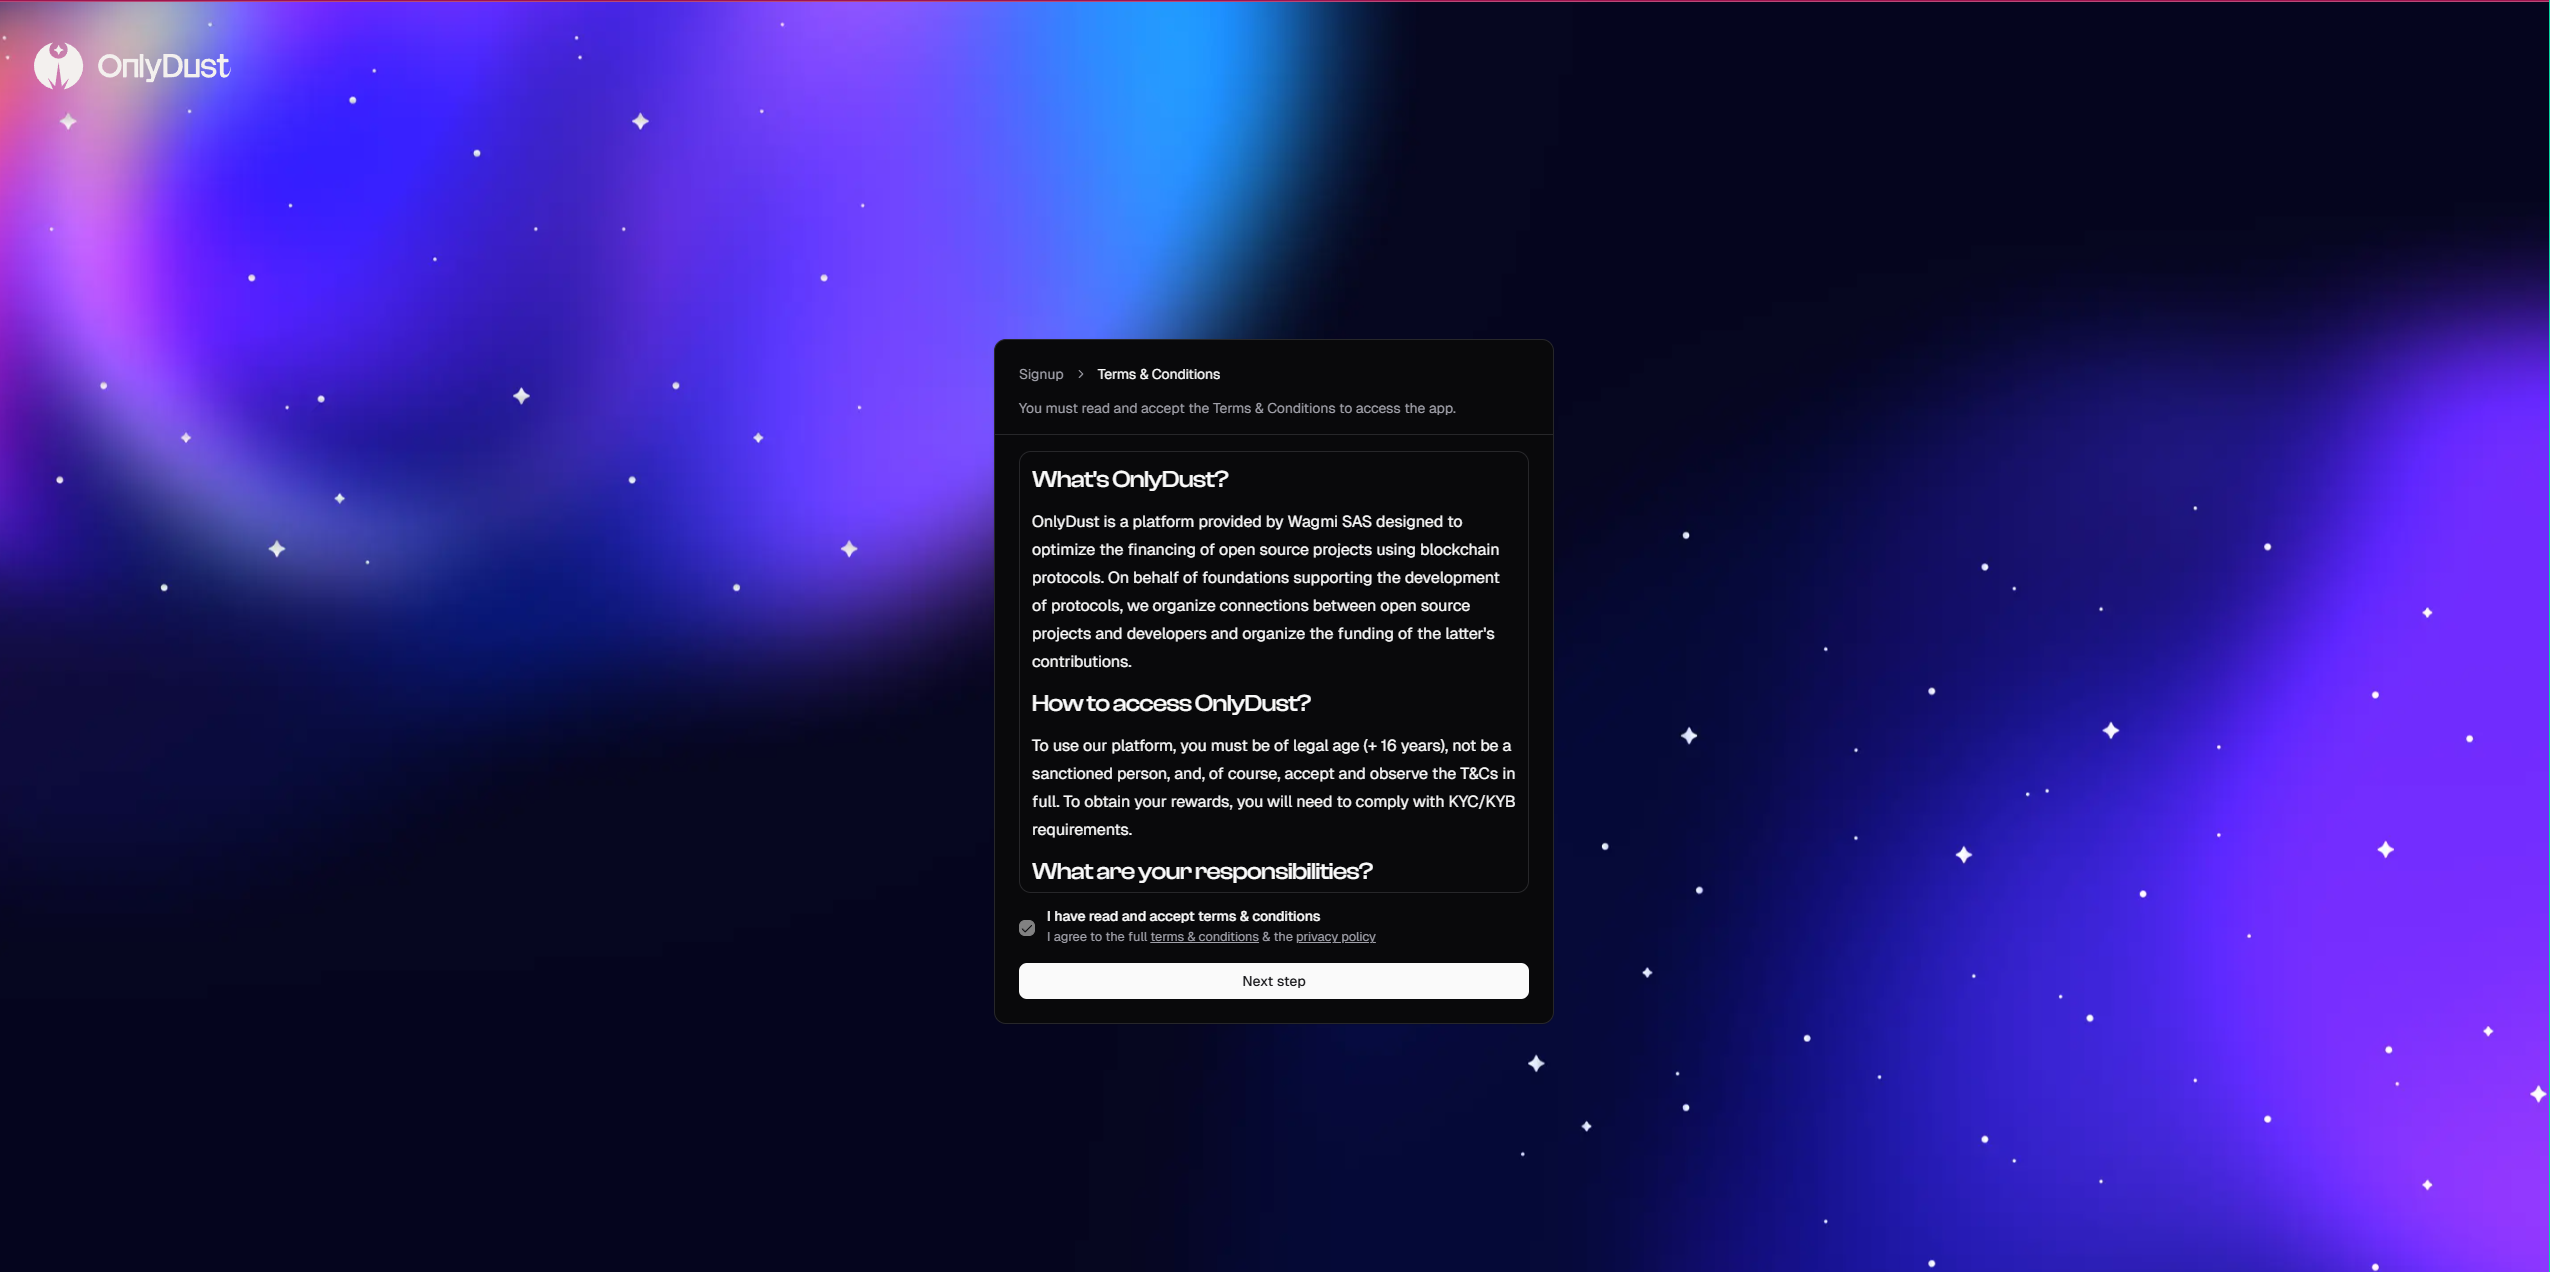
Once your profile is complete, you’re ready to start exploring and contributing to projects!
Step 3: Explore and find projects
Now that your profile is set, it’s time to explore projects! There are a few ways to go about this.
1 - On the "homepage" you will see that you can discover projects based on which ones have Good First Issues available, Categories of interest or those that are the most trending, collaborative or with a recent activity.
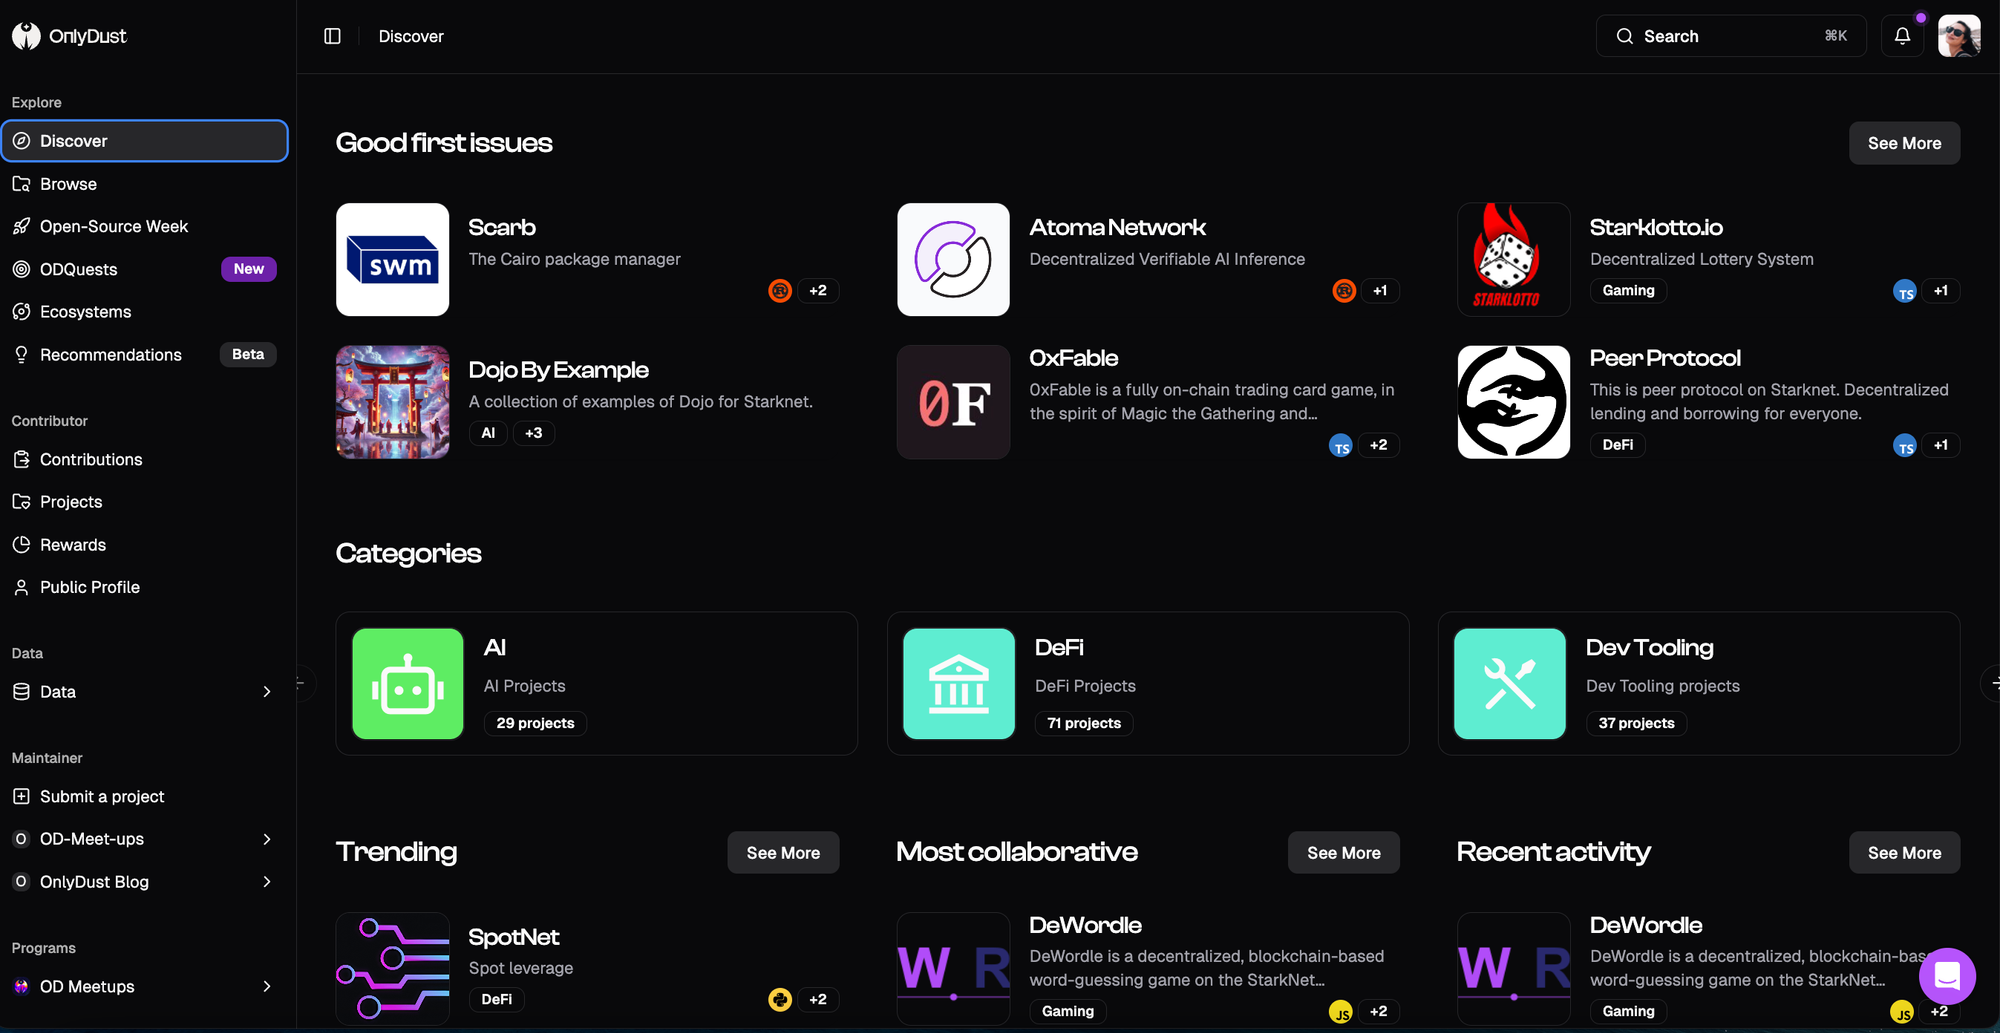
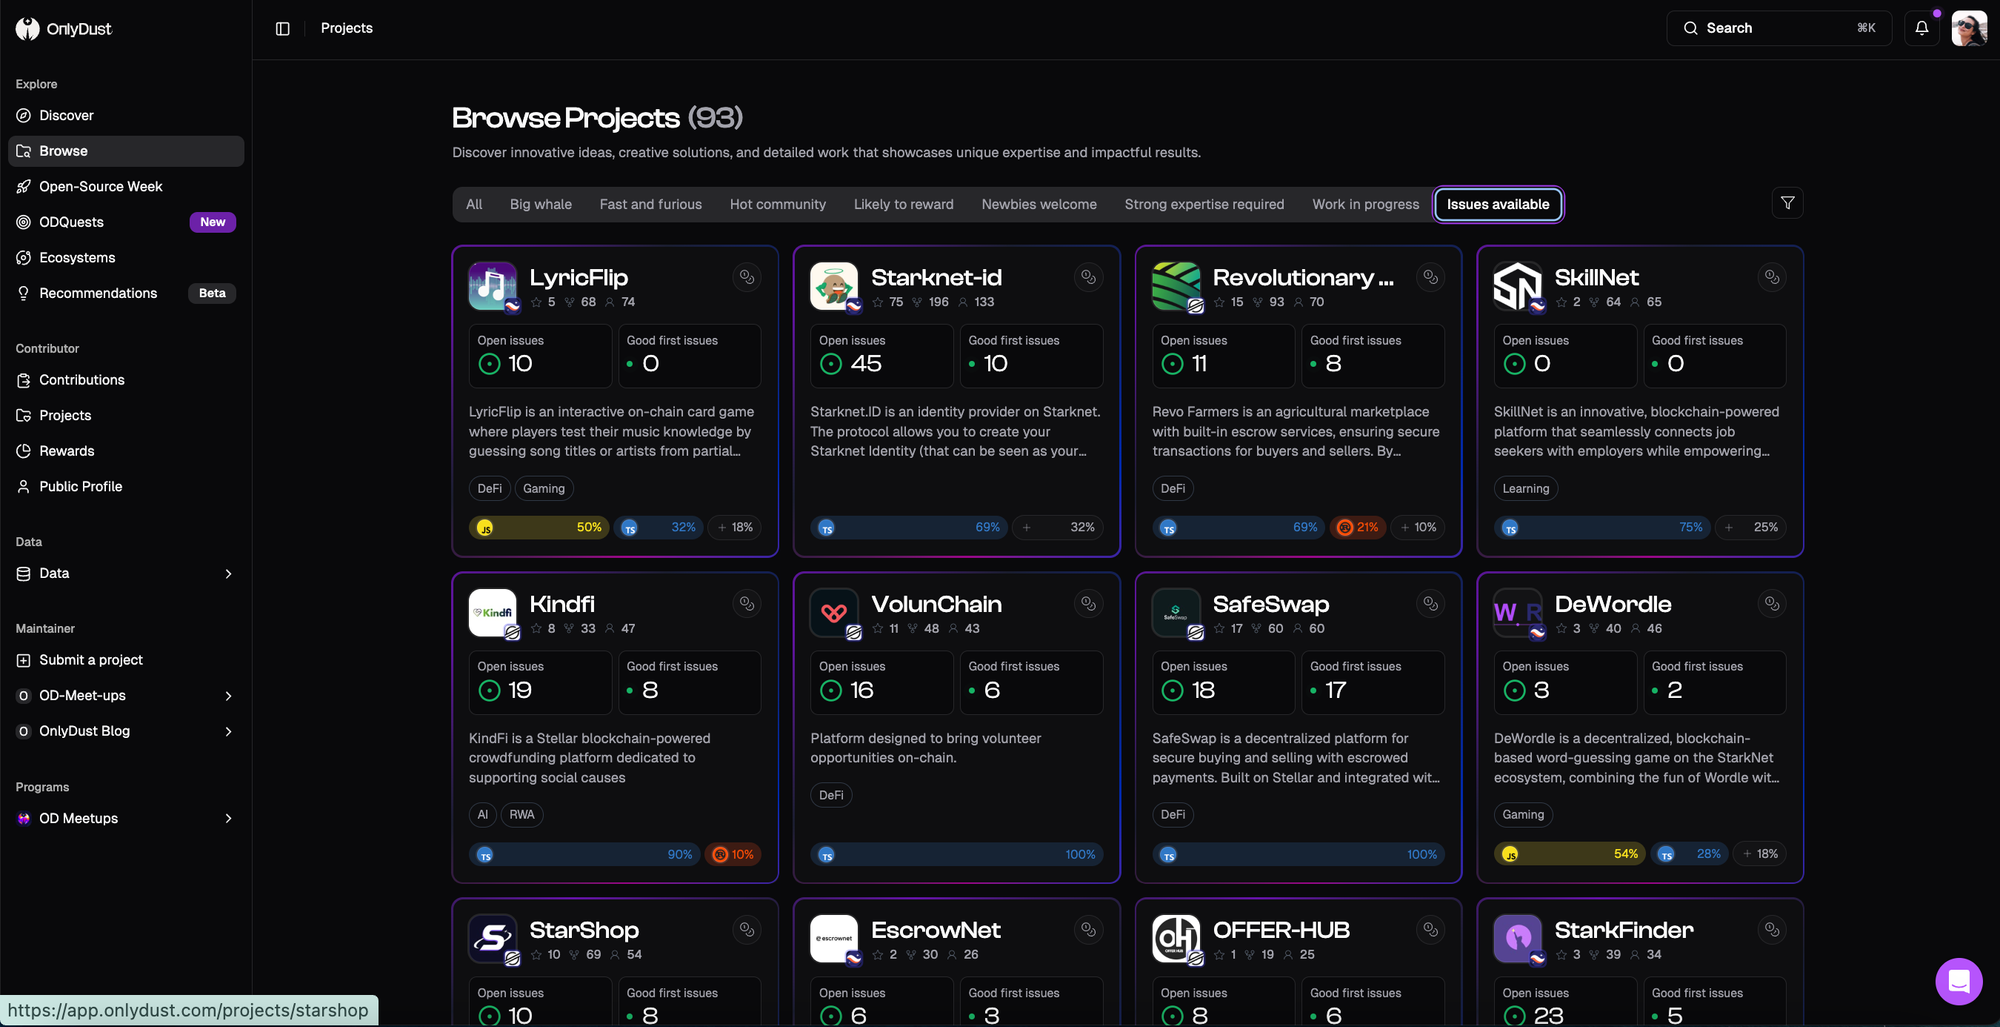
2 - You can dive in deeper by going into the "Browse" tab in the menu to explore all of the open source projects that we currently have on the platform. You can use the filters to help you find the project that you are interested in.
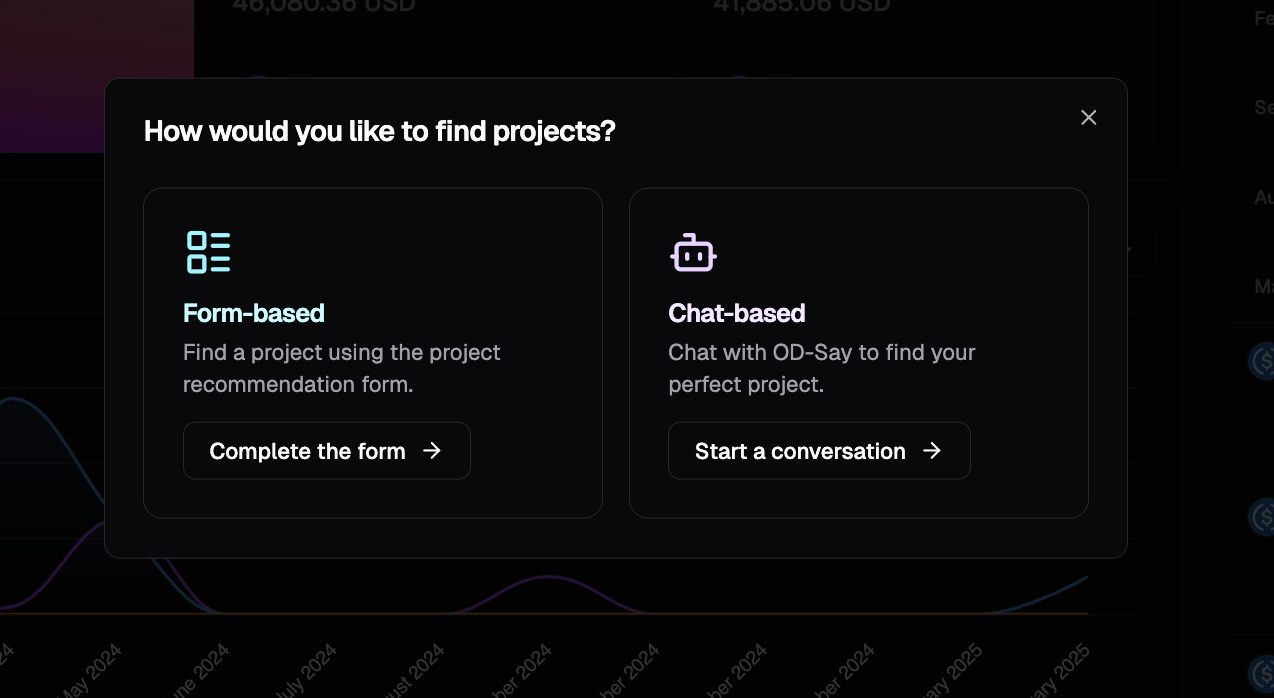
3 - Or, have some fun with our OD-Say bot (under "recommendations" in the menu side panel) and chat to find the perfect recommended projects for you.
Step 4: Dive Deeper Into a Project
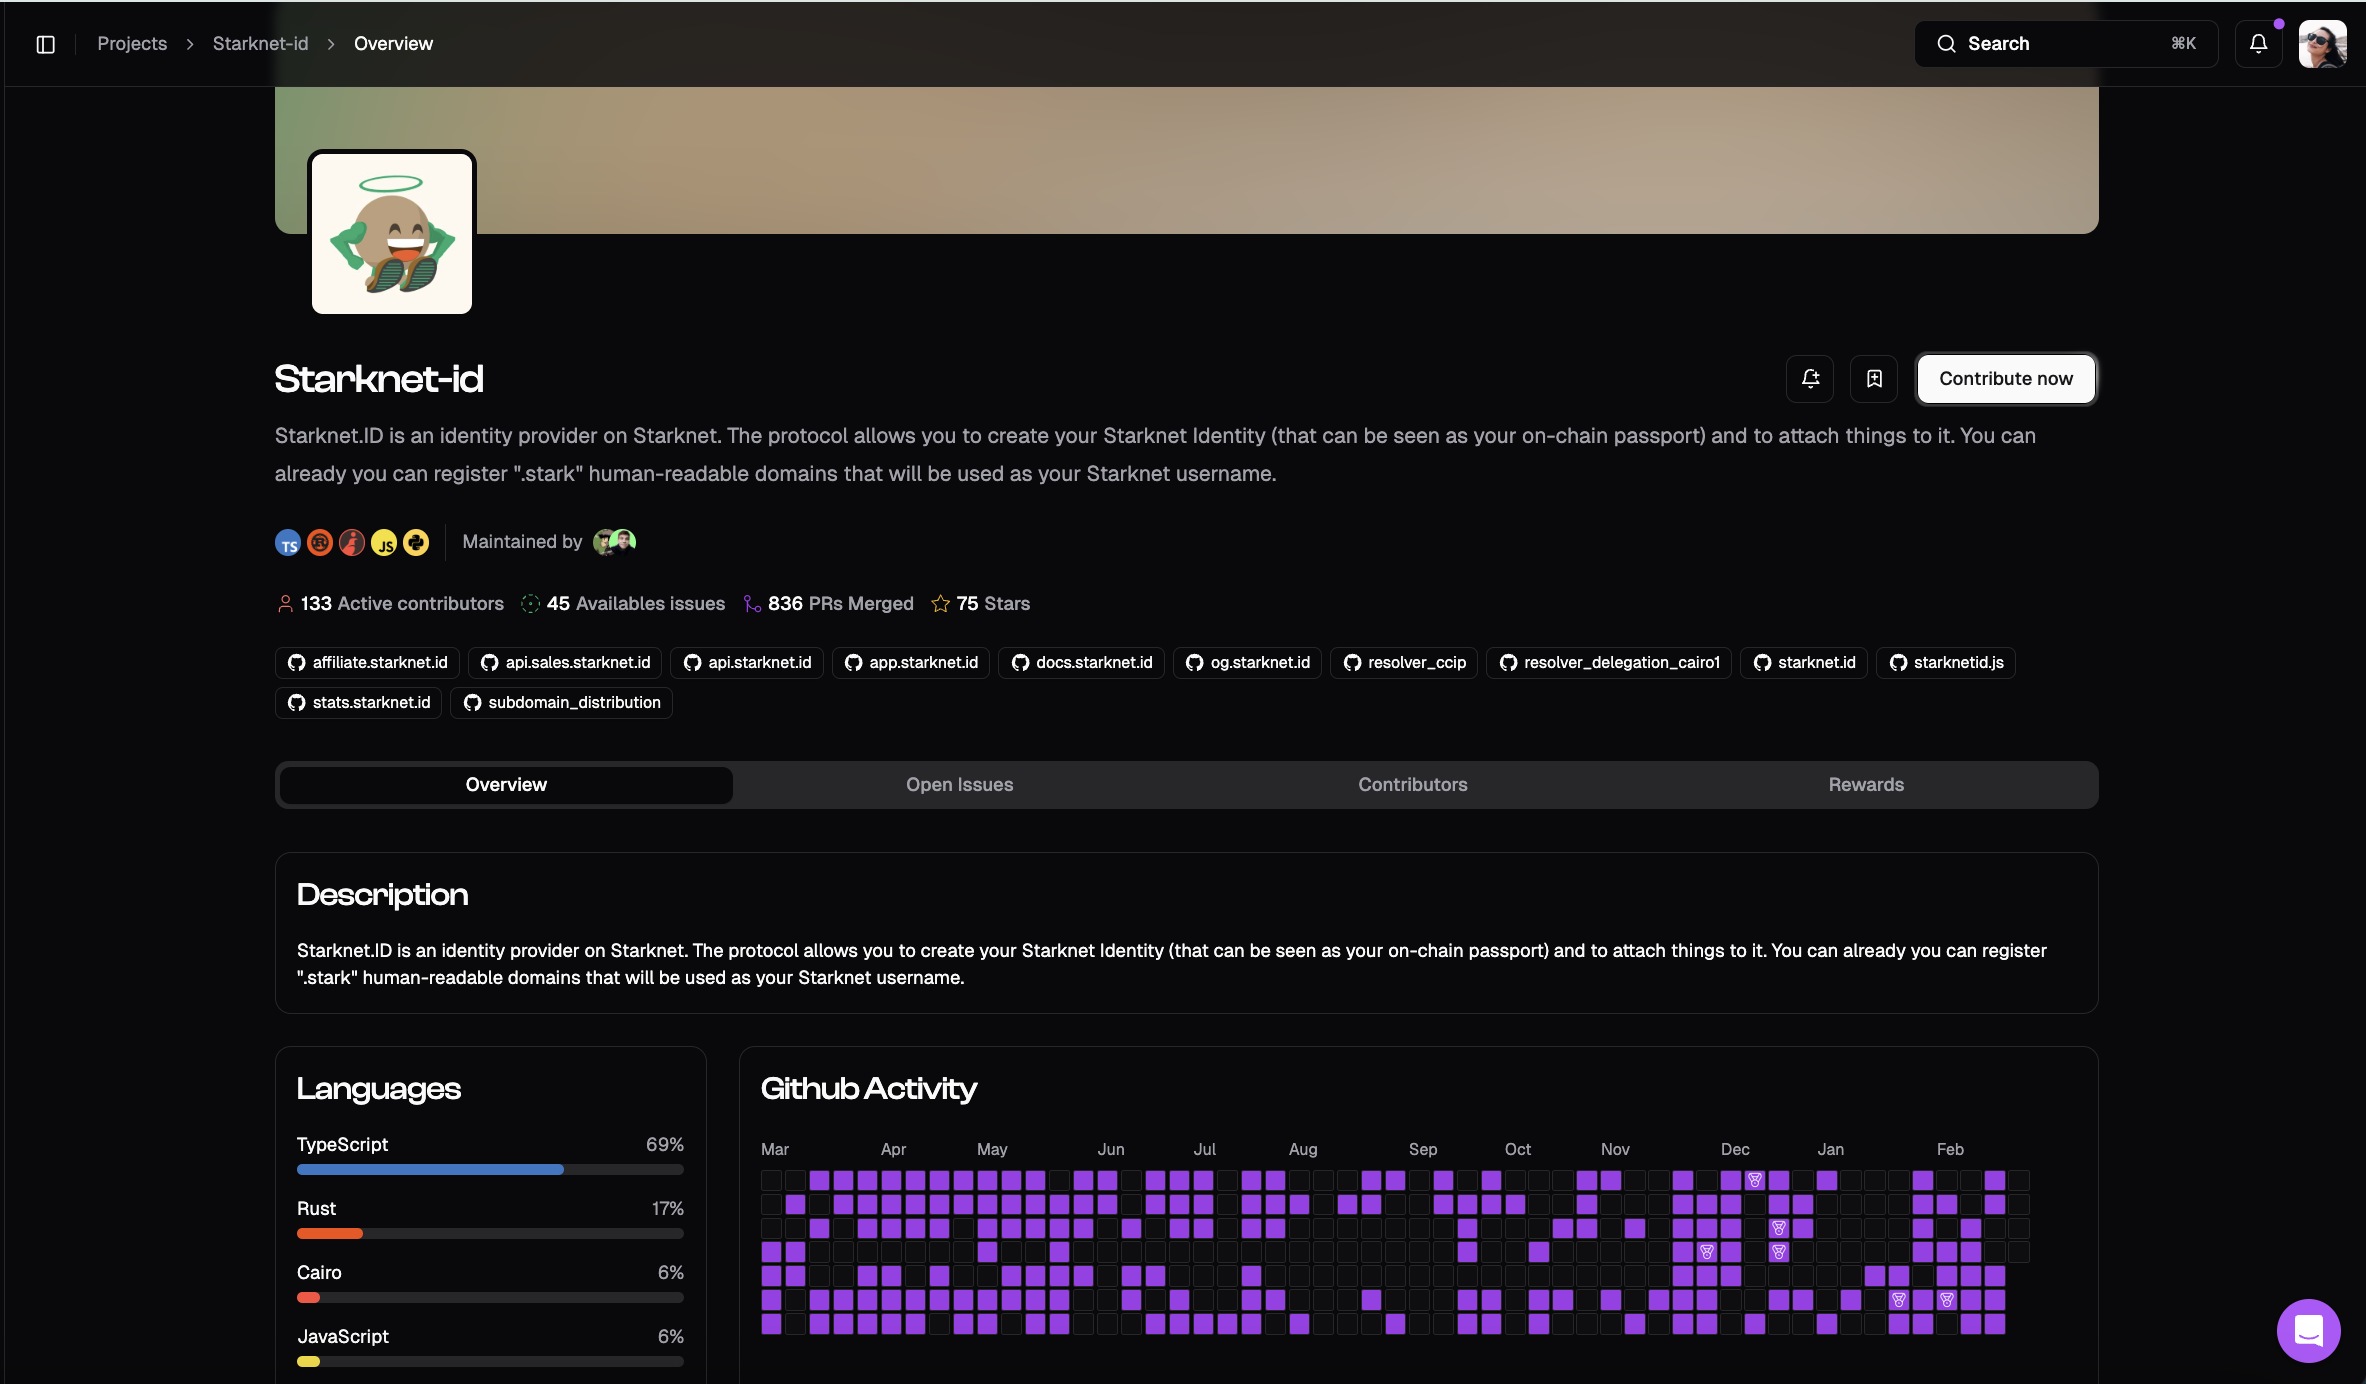
Once you find a project you like, it’s time to dig deeper and learn more about it. Here are a few tips on what to do next:
- Visit the project page: Here, you’ll find everything you need, including:
- Contact information for project leads.
- Links to repositories where contributions are made.
- Instructions for joining the community (Telegram, Discord, etc.).
- Join the community: Engaging with the project’s community is crucial. Introduce yourself, ask questions, and get to know the maintainers. If you’re unsure who to contact, ping @blumebee on Telegram for some guidance!
- Understand the project: Read through the project’s contribution guidelines on GitHub. This will give you insight into how they work, their goals, and how you can contribute effectively.
Step 5: Find and apply for open issues
Once you’re familiar with a project, you’ll want to start contributing. Here’s how:
- When you browse through projects, you can use the filter "available issues" to have a look at projects that are looking for contributors. When a project catches your attention, on the project’s page, you’ll see if any good first issues are available. These are tasks that can help you get started.
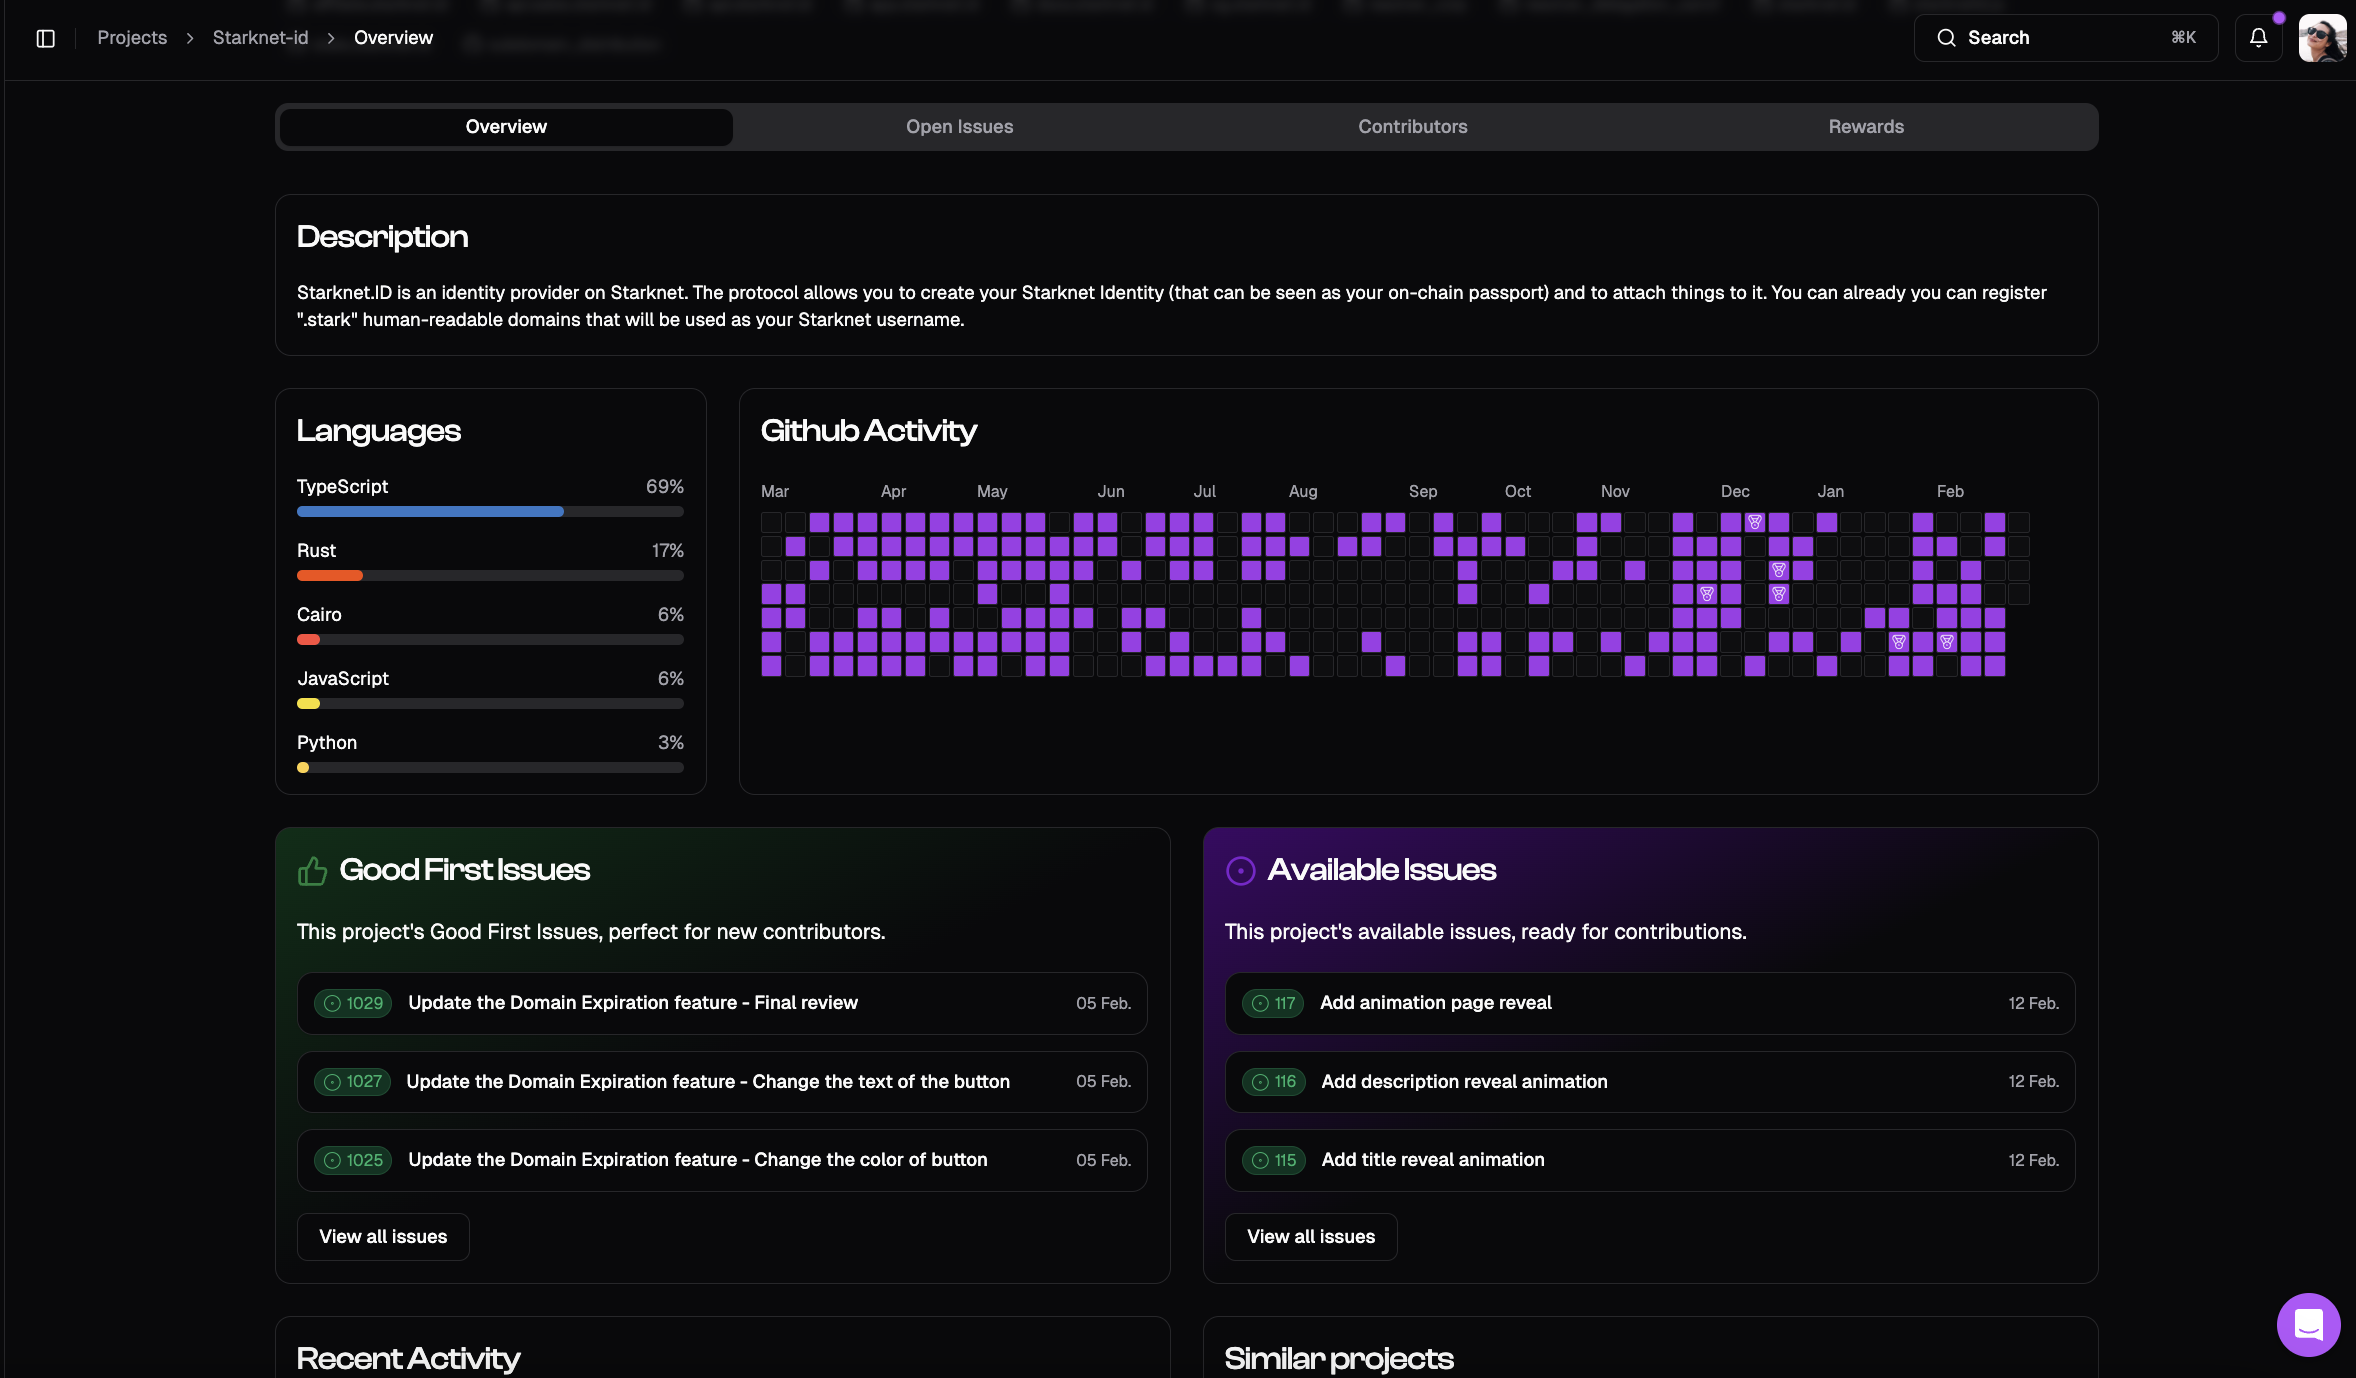
- Apply for an issue: If you find an open issue that interests you:
- Click “Apply” on the issue.
- You’ll be asked to grant GitHub write permissions to allow OnlyDust to post comments on your behalf in the project’s GitHub repo.
- Write a short note about how you’d approach the issue and your background. This helps the project leads determine if you’re a good fit for the task.
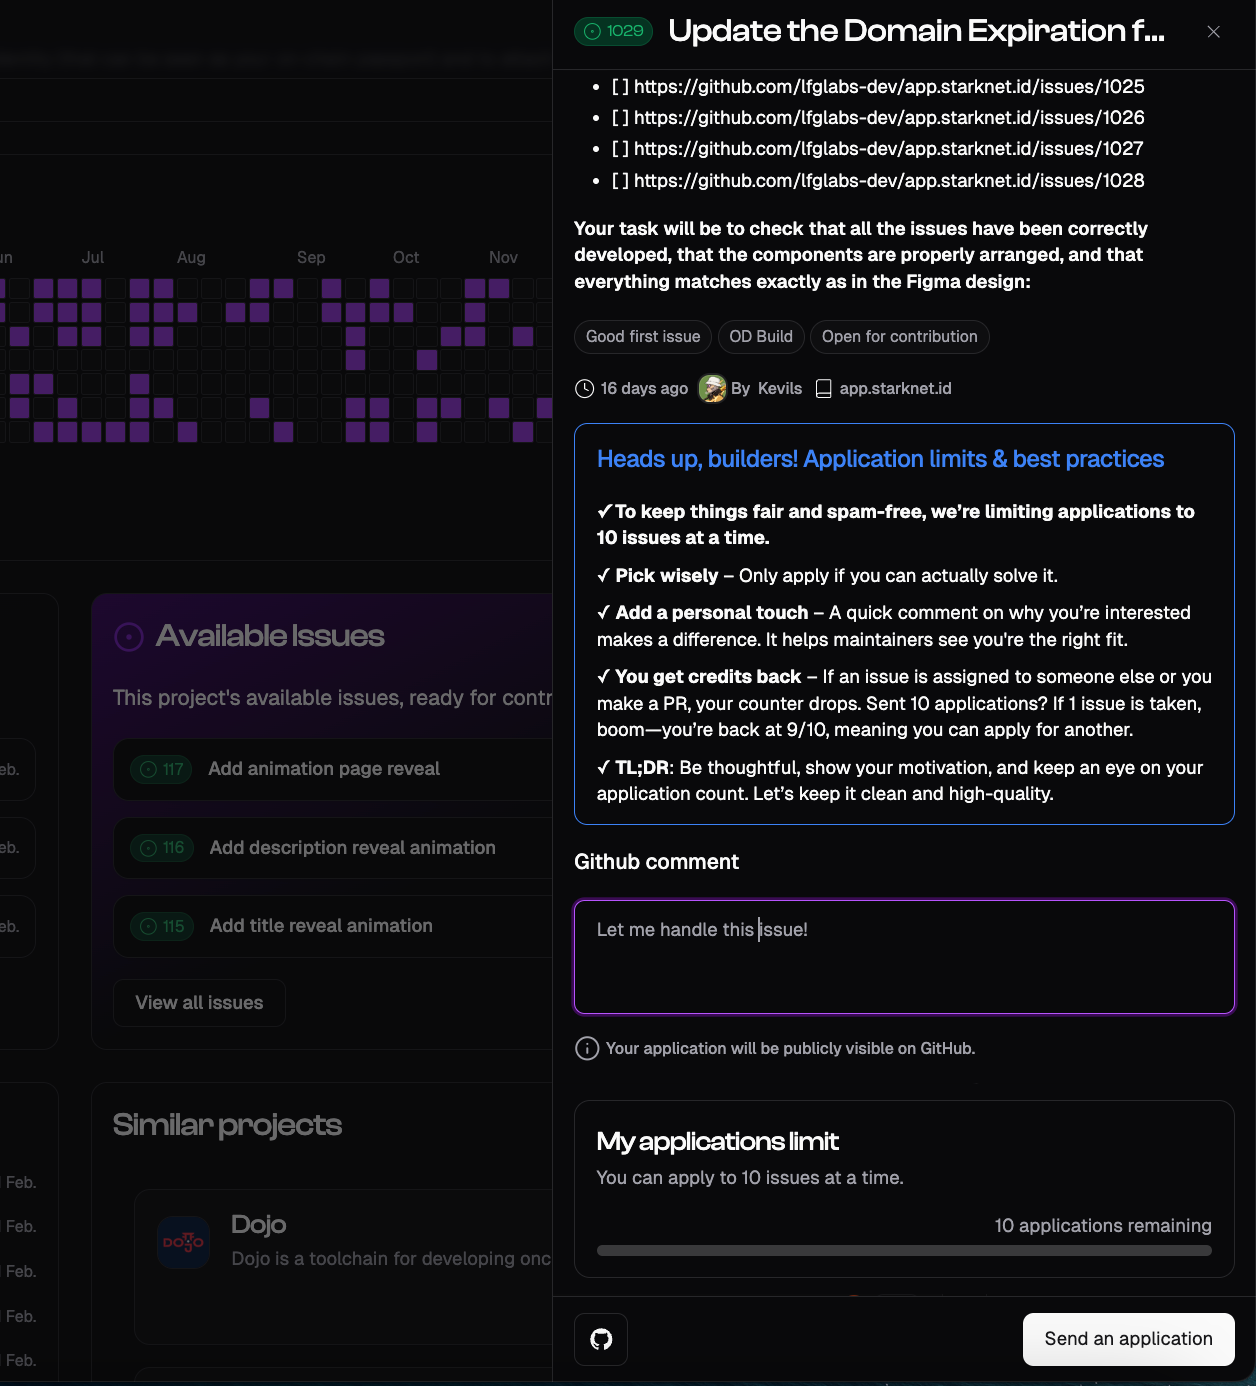
Submit your application: Once you’ve written your intro, your application will be posted on GitHub by OnlyDust. The project leads will then review your profile and assign the issue to you if you’re selected.
Step 6: Make your first contribution
You’ve found an issue, applied, got assigned and now it’s time to make your first contribution! Remember to:
- Read up on the project’s guidelines: Before diving in, ensure you understand the contribution guidelines. This helps avoid misalignment.
- Stay engaged with the community: Communication is key! Join their Discord or Telegram to stay in the loop and ask for advice when needed.
- Focus on a few projects: It’s tempting to contribute to multiple projects, but we recommend focusing on 2 or 3. This allows you to make meaningful contributions and get to know the project better.
Track your progress
Once you’ve contributed, you can track your progress on OnlyDust. The platform keeps a record of your contributions, building a portfolio of your work. This can be useful for job hunting or showcasing your impact in the open-source space.